January 27, 2011

EOTD - Rocker Girl Smoky Eye

Updated 03/05/2011 & 03/06/2011


This is strictly my own personal opinion about the matter. All material uncovered was done through a public google internet search with a few different keyword entries.

Due to information uncovered and revealed about this company, I cannot in good conscience or good faith recommend anyone support this reportedly handmade, organic small business. If information had been disclosed prior to discovery by the shop owner herself, I would have no problem with continuing to purchase. Regretfully, the scope of the lie and how many different people it could have potentially affected and hurt leaves me no other choice than to say this is not an honest company to do business with.

For information as to why, you can read more below:


http://the-eyes-have-it-all.blogspot.com/2011/03/this-way-that-way-which-way-whats-going.html
http://the-eyes-have-it-all.blogspot.com/2011/03/long-tale-of-orglamix-organic-ending.html


Or click here for more links and topics. The information can be found just below the introduction paragraph on the page.

**********************************************************


It's a miracle!
Two days in a row, and I've done my makeup! Ha ha ha! Well, it's not that far off the charts... But if I can say so myself, this is one of my "typical" looks. Anything soft, smoky and glittery is right up my alley. However, by the time I snapped the pictures- you could see my purple under eye circles.

It drives me nuts how they tell the entire world how well I feel, how much I've slept... Sheesh. A lesson well learned- while we all strive to get rid of those awful deep-colored half circles under our eyes.... Sometimes, they just do not want to cooperate! It's alright though.... They did stay hidden for the majority of the day, so I can't get too upset!

Anyways, this is super-easy and quick to throw together. Great in a pinch if you have to get ready in a hurry- and if you want, you don't even need black eyeliner... Just use the shadows as liner either wet or dry... And out the door you go!

On my face:
Nivea Moisturizing Cream
e.l.f. Complexion Perfection
e.l.f. Concealer & Highlighter Duo
Physicians Formula: Organics Mineral Foundation in Translucent Light

Eyes:
Orglamix Cosmetics Magnetism eye primer
Eyeshadow Stone went all over my lid
Concrete Minerals eyeshadow in Seance & Strobe Light
Both are blended together on upper lash-line, and on lower lid into lashes
(First time wearing them since purchase )
e.l.f. Essentials custom eyes in Ivory on my brow bone
Wet 'N Wild Kohl Eyeliner Pencil in Black on top lid & waterlines
Wet 'N Wild MegaPlump Mascara

Cheeks:
Moi Minerals eye shadow in Wish
e.l.f. Essentials custom face in glow

Today was low key... Can you tell?!
I mean look... I'm in a pink striped shirt! It's alright though, it's comfy ;)

x0x0x0 ~*Snarky P

January 26, 2011

Totally Awesome Konadicure!

I know I haven't made a video about it yet, but I've posted a couple pictures to show you what I've been up to lately. Well, since I received my Konad stamping kit and Bundle Monster Stamping Plates almost 3 weeks ago, I've been having a ball!

Typically, when I give myself a manicure.... I'm lucky if it lasts 2 days without chipping. Tip wear, chips, cracks, and feeling like I have "thick polish" on my nails drives me batsh!t crazy. What to do?!

Well, normally... I sit there and pick at the crack or chip. And it gets bigger. So I pick some more. We all know that once a hole emerges, there's no going back. No smoothing out the edges of the polish again, unless you go back and paint the nail all over again. Oh what a hassle!


And now a Public Service Announcement:

My apologies for my awful cuticles, and scaly skin. I've been going through a dry skin bout, and working on getting it healed up! It takes a little while of course.

That being said, can you believe that awesome violet-pink is one and the same purple in all these pictures!?!?! Yes, it is! And one of my absolute favorites in my entire collection!

Who has this must have polish? Why, Sinful Colors of course! Dream On is this great color I've used...  Two coats, over a base coat, and the color is vibrant and silky. This is actually a matte nail polish- aka it doesn't dry with a high-gloss, wet-look finish. Funny story- the first time I put this polish on, I thought something was wrong with it. I rolled it to mix for about 10 minutes straight. I seriously thought it wasn't mixed well enough.... I guess epic blonde moments still happen!

I've been dying to do different patterns on each nail, but have been having a difficult time deciding what I wanted to do. I was going to do only two "focal nails" with Dream On, but I wanted more color. So I decided alternating nails would have to do. For the black, I used Sinful Colors What's Your Name. For a black polish, this one caught my eye because of the micro-glitter it has. It's flecked with gorgeous peacock holo-glitter, so there's some great tones of purple, green and blues in it. I'm watching this application, since I've only worn it once before.... And it chipped like hell the second day I had it on. You guessed it, I picked it off. I seem to have a better base coat, and I now use Seche Vite top coat for my mani now.

Once my base colors were applied, I topped them off with a coat of Seche Vite.
With the black polish, I used a Sally Hansen Silver Chrome with the Argyle pattern on Konad plate M60. On my right thumb and left pointer finger, I tried to use the flowers with Konad Special Polish  in Gold-Black over the Argyle pattern, but it didn't show up very well. It's sort of like a shadow- I kind of dig it!
With the violet-pink polish, I used the polka dot stamp from Monster Bundle plate BM19 in KSP Gold-Black, then stamped partial portions of the swirl design on BM12 over it using the SH Silver Chrome polish. I topped 'er off with another coat of SV, and we're lookin pretty darn good if I do say so myself!


I didn't quite like the last mani I did, so I'm not showing you!

This isn't bad for the 4th time I've done stamping, is it?! Proof how easy it is!!

x0x0x0 ~*Snarky P

Kicking off FOTD/EOTD

Updated 03/05/2011 & 03/06/2011


This is strictly my own personal opinion about the matter. All material uncovered was done through a public google internet search with a few different keyword entries.

Due to information uncovered and revealed about this company, I cannot in good conscience or good faith recommend anyone support this reportedly handmade, organic small business. If information had been disclosed prior to discovery by the shop owner herself, I would have no problem with continuing to purchase. Regretfully, the scope of the lie and how many different people it could have potentially affected and hurt leaves me no other choice than to say this is not an honest company to do business with.

For information as to why, you can read more below:


http://the-eyes-have-it-all.blogspot.com/2011/03/this-way-that-way-which-way-whats-going.html
http://the-eyes-have-it-all.blogspot.com/2011/03/long-tale-of-orglamix-organic-ending.html


Or click here for more links and topics. The information can be found just below the introduction paragraph on the page.

**********************************************************


Alright.

I'm going to try and post an eye of the day/face of the day at least three times a week. I'd venture to say I'll do one each day... But honestly... I don't put makeup on every day. Sometimes I get up, and I don't feel like taking the time or putting in the effort. Not every day is like that, but sometimes I don't want to paint my face.

So... To kick it off, today's look was this:


January 25, 2011

Get The Look - Moi Minerals "Dramatic Red & Gold"

Hell-ooooooooooo gaw-jus!
Rich jewel tones on your eyes? Yes! Even red?! Absolutely!!! Grab your favorite pair of black pumps and vamp it up girls!
While hard to believe, you can wear red on your eyes without looking like you're having an allergy attack or a pink eye infection. The trick is to match it with complimentary colors, and blend well! And never- ever ever ever- put it on your waterline. That will definitely make you look sick! Pick a color that will compliment your skin tone- you don't want a red that resembles irritated skin. Anyways... Onwards and upwards!

The majority of the cosmetics used in this tutorial are from Moi Minerals Cosmetics, and also from her Etsy shop!! There's a light taupe and a pretty gold color I've used from the e.l.f. Limited Edition Natural Palette. Other cosmetics include Wet 'N Wild kohl eyeliner, gel eyeliner, and MegaPlump mascara.

I had already done my foundation- which consists of Physicians Formula Organics: Mineral Foundation in Translucent Fair. I've also used e.l.f. Concealer & Highlighter under my eyes, and over blemishes. The highlighter went on the bridge of my nose, the top of my cheekbones, and the "V" above where my nose is. I finished off with e.l.f. High Definition Powder.

What's on my eyes for colors from Moi Minerals:
Rockstar Red (medium)
Crazy Bitch (dark shimmery; eyeliner)
Shimmers & Pearls
Galaxy (over eyeliner to set)
The Natural Palette colors from e.l.f. I've used were:
Shimmery Gold in the top row, middle pan.
Light Taupe in bottom row, far left pan.

Watch the video below to see how to create this look!


So there you have it... Sexy, sultry eyes using red and gold!! As I said- you don't have to wing the shadow out as far as I did for this look. You can bring the red slightly above your crease and right to the end of your eye for a more subdued look. Wing the shadow out a touch, and blend with the gold color at the edges- and you still have a pretty eye look!

What do you think? Is this something you'd rock on out to, or subdue a bit?


x0x0x0 ~*Snarky P

January 23, 2011

~*CLOSED*~ Fashion Forward: "Well Polished" Jewelry Giveaway from Ginger Kitty Designs

~*~*~*~* This Giveaway is now closed. Please feel free, however, to check out Ginger Kitty's amazing Etsy shop! *~*~*~*~

Happy Sunday to you all! I hope this weekend has been relaxing, or at least fun! I'm here with another exciting giveaway for you to enter!

It's last minute again... Because this week has been crazy! But take a look through her Etsy Shop to see the different rings, bracelets and pendants she makes by hand into fabulous jewelry... With nail polish!!! Can we sayyy.... Creative?! You can also find her on Twitter!! Tweet!

I mean, how awesome are these?!
Shattered Nail Polish Rings
Purple Holo Swirl Nail Polish Ring
Bad Kitty Nail Polish Ring
The rules for entering the contest, which have been copied from her blog:

Ok...we all need rules...so here are mine:

1) Become a follower of my blog and post a comment to enter = 1 entry
2) Post your email address = 1 entry
3) Follow me on twitter (gingerkittyd) (post your twitter name) = 1 entry
4) Tweet about me or the giveaway (post link) = 1 entry

Want to earn EXTRA entries?? one extra entry each:

~ Visit my store and tell me your favorite piece is = 1 entry

~ What piece of GKD jewelry do you own? = 2 entry

~ Blog about this giveaway (post link here) = 3 entries

Possible total entries per person = 10

Drawing will be Monday January 24th

(Please follow these simple rules or unfortunately all of your entries will be void)

Remember- you need to post comments on Ginger Kitty's Blog, not mine!
Unless, of course, you want to comment on how awesome her creations are ;)

Want something other than a ring? Budget friendly prices and great selections also include pendants, bracelets and earrings too! The combination's of colors are endless!


Nail Polish Bracelet
Assortments of goodies!
Hello Kitty!!
xoxoxo ~*Snarky P 

January 22, 2011

Get the Look - Moi Minerals "Rockin' Hot Pinks"

I've been having a hot, steamy, and sexy love affair. It's bad, but oh it feels so good. For a gal who used to despise anything pink... I'm finding now I really enjoy wearing it in my makeup looks. From time to time, I can even be caught in a (gasp!) pink shirt. Considering red is my favorite color, one wouldn't think I'd have hated pink the way I used to. I wouldn't even wear pink-ish lip gloss... It was that bad.

Then along came mineral makeup, and it did wonders for my skin... And I also found that the pigments used were amazing- every color in the spectrum was available to choose from! And the red colors... Ranging from beautiful rich reds and cranberries, to baby pinks with a hint of color, to bright hang-on-to-your-horses pinks which are almost neon. And of course- some which are!

It's this I've come to acknowledge, pink is hot. Beautiful. Pretty. Innocent. Seductive. Sinful. And absolutely irresistible. This is one of my favorite combinations to put together. Using Moi Minerals Cosmetics, I've created a "Rockin' Hot Pinks" look utilizing different pinks and a rich glittery gray-black shadow. It's guaranteed to stop people in their tracks!

To create this look, you will need the following colors:
Galaxy
Psycho
Sparkled Rose
Angel Eyes

Eye Shadow Primer.
Additionally, you'll need a black kohl eyeliner pencil.
You can use the pencil to finish off the look, or instead use a gel eyeliner or liquid liner pen. I used the kohl pencil because the black is smudged and smoky, and then set with the eye shadow- so a precise line isn't quite necessary. The more smoked out the blacks become, the better the end result!
Break out your favorite plumping mascara- because lashes that are full, plump and thick are really going to pop this look! You can absolutely go ahead and put on some false lashes to really enhance your eyes nicely- but as you can see (and my apologies), my lashes are quite large as is. If you need a little extra help... By all means... Go for it!

To begin, apply the shadow primer to your lids first in a light layer. You don't want to put too much on and have it feel thick and greasy- but you also don't want so little as to have an uneven application- which will turn out blotchy results. After about 10 seconds of the initial application, your skin has warmed the formula and made it more pliable. Using your fingertips, lightly work the primer over your skin again- this will create a smooth base for your shadows to adhere to. Remember to swipe a little bit onto your bottom lash line also- we don't want the colors down there to fade or wear off! A dab is all that's needed.

Continuing on, you want to use five types of brushes:
A dense, contoured eye shadow brush like this one from e.l.f.
A fluffy blending brush like this one from e.l.f.
A small crease brush like this one from e.l.f.
A flat eyeliner brush like this one from e.l.f.
A lip brush like this one from e.l.f.

Using the contoured eye shadow brush, pick up Angel Eyes first and apply it to your brow bone. Drag  a little of the color down towards your crease.

Next, line your top lid and bottom lid with the black kohl eyeliner. Using your finger, a Q-Tip, or your eyeshadow brush, lightly go back and forth over the liner to smudge the color. This should be a rather thick line that will cover the bottom half of your upper eyelid, and a generous line along your lower lid.

Using the small crease brush, pick up Psycho and apply it to the upper half of the eyelid. Swipe a small amount on the outer half of your bottom lash line.

Using the eyeshadow brush, pick up Sparkled Rose, and apply it to and and above the crease. Also apply a bit to the inner corner of your lower lash line, and pull it along the bottom lid until you mix it with Psycho.

Now taking the blending brush in your crease, lightly blend Psycho and Sparkled Rose together so it creates a gentle gradient. Wipe the brush off lightly on a paper towel, or whatever is handy, and use the brush to blend Angel Eyes and Sparkled Rose together just under the brow bone.

Taking the small crease brush, pull Sparkled Rose into a slight cat-eye shape (as seen in the picture above) and blend the edges out so they're soft. Pick up a little more of Psycho, and pat the color onto the top half of your lid. This will make the color a little more vibrant on your eyelids. The same is done for Sparkled Rose, but applied to just above the crease only.

Take the kohl pencil, line your upper and lower waterlines. Using the eyeliner brush, pull some of the eyeliner applied to your top lid out to make a slight cats eye. Pick up Galaxy on the same brush, and apply it over the black eyeliner on your top and bottom lid., and bottom waterline Blend back and forth to smudge the lines slightly, but don't over-do it... Otherwise, the sparkle will disappear! Make sure your eyes are completely outlined in black- you want to come around the tear duct at the inner corners of your peepers!

Curl your lashes, and apply two coats of mascara on your upper lashes. Apply one coat to your bottom. If you want to put on fake lashes, go ahead and do so at this point!

Taking a blush brush, pick up Sparkled Rose and apply to the hollows of your cheeks , and onto the outer half of the apples of your cheeks. Bring the color back to your hairline, and up slightly onto your upper cheekbones. To highlight, pick up a little bit of Angel Eyes and apply it to the upper half of your cheekbones. 

In order to finish the lips, all that's needed is Psycho, water or foiling serum, and some lip balm! Apply the balm to your lips as a base. Pick up a little of the shadow and add enough water/serum to liquefy it. Using the lip brush, apply it to lips as is. Mush, and pucker up buttercup!

I added the little heart sticker to go along with the look- they can be found in the sticker section of your favorite craft stores! This was a 3-D heart sticker pack :) In order to avoid having it fly off my face, I used a dot of eyelash glue to keep it in place.

And there you have it- the "Rockin' Hot Pinks" look!

So what do you think? Would you wear anything as bright as this?

xoxoxo ~*Snarky P

January 21, 2011

Get The Look - Peacock Inspired Eyes I

Updated 03/05/2011 & 03/06/2011


This is strictly my own personal opinion about the matter. All material uncovered was done through a public google internet search with a few different keyword entries.

Due to information uncovered and revealed about this company, I cannot in good conscience or good faith recommend anyone support this reportedly handmade, organic small business. If information had been disclosed prior to discovery by the shop owner herself, I would have no problem with continuing to purchase. Regretfully, the scope of the lie and how many different people it could have potentially affected and hurt leaves me no other choice than to say this is not an honest company to do business with.

For information as to why, you can read more below:


http://the-eyes-have-it-all.blogspot.com/2011/03/this-way-that-way-which-way-whats-going.html
http://the-eyes-have-it-all.blogspot.com/2011/03/long-tale-of-orglamix-organic-ending.html


Or click here for more links and topics. The information can be found just below the introduction paragraph on the page.

**********************************************************


It's been a long few weeks... And I know you gals have been super-patient waiting for this vid to arrive... And I appreciate you sticking around waiting for it!

This is the first in a peacock inspired series- there are literally so many different ways these colors can be worn, combined and accented that I'll put together a bunch for you! Next up you're likely to see another sports team... I gotta get crackin on those babies!

I've always been fascinated by birds with iridescent feathers, and unique patterns. These include (strangely enough) Blue Jays, Mallard Ducks, Peacocks, Pheasants and many other birds. Up here, when I was little, a guy a town over used to keep the birds in pens in his yard. People would stop and park on the side of the road- and the birds, true to their character, would usually be persuaded to show their colors. Not by intimidation of course- but they loved the attention they would get. I think the walnuts helped too... Ha ha ha! I remember stopping with my Grandfather too, many times. Oh- it's the good memories!


Without any further ado, I give you Peacock Eyes!

On My Face:
Nivea Soft Moisturizing Cream
e.l.f. Complexion Perfection
Physicians Formula Organics: Mineral Foundation in Translucent Fair
e.l.f. High Definition finishing powder

On My Eyes:

Orglamix Cosmetics in order of application:
Magnetism Eye-Primer (topped with a pat of the high definition powder)
Snow (on browbone)
Acai Berry on lid only
Lavande applied over AB, and blended
Celadon applied above the crease and blended into Snow, pulled down to crease. Touch more applied
Aegean applied to crease, blended well with Celadon, lightly blended with purples, and more applied
Solar applied to inner corner of eye, blended lightly with purples and into Aegean
Solar applied to inner 1/3 of bottom lashline
Lavande applied to outer 1/3 of bottom lashline
Celadon applied to middle of bottom lashline, blended into other two colors lightly

Wet 'N Wild Black Kohl Eyeliner applied to upper and lower waterlines
Aegean applied to bottom lashline with straight eyeliner brush
Wet 'N Wild Gel Eyeliner in black applied to upper lashline
Curl eyelashes, and I applied Wet 'N Wild MegaPlump mascara in 2x coats

Cheeks are finished by sweeping Orglamix's Mineral Blush in Ginger across the hollows of my cheeks and upper cheekbones. Lips have e.l.f's Luscious Liquid Lipstick in Candlelight applied.

Done!

What do you think?
This look is quite toned down due to the lighting- it's quite a bit more intense in person than pictures show! The glitters that catch in the sunlight are gorgeous- so please, don't be mislead by the pictures!

xoxoxo ~*Snarky P

~*Giveaway Closed*~ Take a Walk On the Wild Side

~* This Giveaway is now closed. Congratulations to the winner!!*~

Me. Blonde. 2009

Brunette early 2010.


Oh yes, I'm starting to feel like I'm getting my mojo back.
Well, on some days I feel like it at any rate... I wish I could get back to drinking caffeine on a regular basis- but that's a big no-no right now as it will make my back problems worse. So, hot chocolate and decaf tea it is! Anyways... The point of my post is this. I finally cleaned my room yesterday. Yeah, I overdid the bending part, but all said and done I felt like I needed to play. With makeup.


Tequila Sunrise, 2010
Custom Extensions, 2009

So out came my stash of Moi Minerals. I know typically I use another company, but I was seeking something specific. A color I had yet to play with extensively. A few in fact. The makeup was inspired.... By... Hair. Yes, you read that correctly. Extensions I've made. I found some pairs I had previously crafted (sans the clippies yet!) and decided that since the other computer I had used crapped out and the hard drive fried- losing all my extensions pictures with it- I'd just have to take some more. It excited me, especially since my mineral eye makeup collection has literally exploded over the past year. Anyways, that's not the point of this post.

Cardinal Sin
The point is that while I had a few color "shocks" in my hair, had a blast styling them into my red locks, and puffing my hair up a little bit... I sometimes want a change in color. And by change, I mean drastic. Like... Wouldn't it be awesome to walk around with purple hair for a day, or night out? How about platinum and pink (one of my favorites), sea-foam green... Electric blue?

Harlequin - Mint


A treasure of an Etsy find I cannot in any way, shape or form resist... Color. Intense color. Oh, I was drooling by the time I had scrolled through the first three rows of products in her shop... I was able to rein myself in luckily.

Scented Conditioning Wig Spray
One of my Facebook Fans suggested I become a fan of MissD's page, which I did... And summarily found her Etsy shop. Whoo-wee! Even better was the treasure I found on her fan page... Under the "Info" tab... It was like it was meant to be. A giveaway for a wig up to $80 from her shop, along with wig spray. Any choice of wig is yours, as long as it's $80 or under! Score! It's giveaway time!

Strawberry Ice
It's my hope that this could somehow end up as an early Birthday gift... Especially considering I'm moving forward into a new decade in a few short weeks! Of course, you may think I'm younger than I am... LOL

Neon Violet Vixen
I do, however, have to share with you in case you get the same kind of hankering to change your haircolor... Albeit temporarily!
Anyways... I'm posting a few pictures below so you can peruse the awesomeness of her wig styles, and the amazing colors! There's a few in her shop I'm absolutely drooling over... But at the moment completely out of my price range. Favorited, though, so I can go back when I can!

Cherry Vanilla Ice Cream
My favorite in her shop... ^^

I really think getting into some crazy-awesome colored wigs when I do my makeup tutorials would really pull a look together... What do you think?? And what do you think I should choose, should I be so lucky? ;) Heyyy... What color would YOU choose?!

xoxoxo ~*Snarky P

January 19, 2011

Fix It - Dark Circles & Puffiness Under Eyes

Grab a cup of something, sit back, and read on! It's a lengthy post this time, but it's jam-packed with  helpful information I didn't want to split up into different parts!

Back in the end of September, I did a blog post about concealing those aggravating under-eye circles that have plagued me (and many of you) for quite some time.

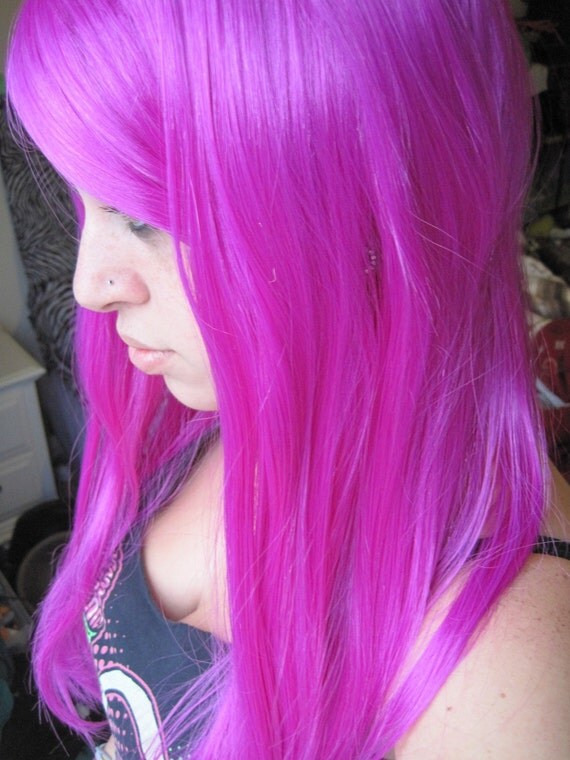
Not a black eye! I swear!
The "technical term" for these dark circles is Periorbital Discoloration.
There are a few reasons this aggravating discoloration occurs, including genetics, lack of sleep, allergies, medications, and sometimes even food allergies. You're asking the same question I once did- "Yeah, I know I have them... But how do I get rid of them?" Depending on the severity of the discoloration, there are a few options. The most invasive would be some type of surgery. While aggravating to try and deal with- I'm sure you're thinking the same thing I did. "Sure, these things bug me... But isn't that a little too far off the edge?!" Hence, we use skills and a little "magic" to hide these puppies.

For those of you which are predisposed to this condition by genetics, you may notice that the circles under your eyes are darker than other folks. This is because the skin which makes up our periorbital socket is some of the thinnest found on our bodies. Bluish tints will be noticeable due to vessels which are found very close to the surface of the skin, carrying oxygen-rich blood to various places. If you have deep set eyes and high cheekbones, you also might find you're dealing with shadowing in addition to the already-tinted half circles under your eyes. Age also plays a part in this discoloration- the older you get, the less elasticity your skin has because it's losing collagen- which translates into our skin being more translucent and showing off more imperfections.

Additionally, any sort of skin condition that induces rubbing or itching around the eyes will also find there is typically irritation, and subsequent darkening, under and around their eyes. Allergies, asthma, eczema, head colds, and food allergies will certainly not help in trying to keep the dark circles at bay. In this case, the "bags" under the eyes may look more like smudges, along with some red irritated skin from rubbing/touching, but they typically aren't as defined or dark as those who have severe discoloration.

Image from The Daily Puppy
One of the most common suspects for these unwelcome guests is lack of sleep. We've all seen that when we're sick, and don't get much sleep... It seems in a matter of hours the usually tame skin under your eyes go from looking decent to horror-movie-makeup-esque. It's a scary thing, indeed. When our system is run down, fatigued, and worn out- the eyes is one of the first places to reflect this. Why? When we're not feeling well, blood flow can slow down, our skin becomes lighter- and there you have it... The culprit. Paler complexion means more the bluish tint of our blood becomes more noticeable, especially under the thin skin of our eyes.

Anemia can also contribute to these dark circles, so during that time of the month and in general, always make sure you have enough iron in your diet. You can increase your iron intake by eating red meat, any kind of tinned or fresh beans, hummus (one of my favorites!), venison, beef, seaweed, figs, prunes, oatmeal, etc.
You can also alleviate some of the darkness and help your absorption of iron by eating Vitamin C rich foods, with the same meal- which include lots of fresh veggies! Kale, broccoli, cabbage, peppers and brussels sprouts. If cooked, make sure they're blanched or cooked until no longer crunchy- the more tender they are, less of the vitamins and minerals stick around. You can also eat fruits such as blueberries, kiwis, oranges, lemons (if you're odd, like me!), black currants, and mangoes!

Now, I do find when my allergies are bothering me, or I'm sick... I tend to get puffy around my eyes. As if the half moons under my eyes aren't bad enough- now I'm looking like a bobble eye fish because of swelling. Great!

The technical term for swelling around the eyes is Preorbital Puffiness or Edema.
The slang term when we say "I have bags under my eyes" most often refers to puffiness, but can also include darkening of the half-moons under the eyes as well.
Many factors contribute to swelling and puffiness of the under (or even around) eye area, with similarities to darker discoloration under the eyes which include fatigue, illness, allergies, age and skin disorders. Different causes may be water retention due to too much sodium in your diet, certain medications, pregnancy, menstruation, oversleeping (yes, it can happen!), and certain other diseases which can be referenced on the Wiki page. Crying will also make our eyes puff- so don't be too alarmed if that's why you're looking a little extra piqued.

There are a few ways to help alleviate puffiness around the eyes- if you're having an allergic reaction due to seasonal allergies, an anti-histamine medication will be the first step in taking it down for you. Slicing a fresh, refrigerated cucumber into circular slices and placing them on your eyes for 15-20 minutes will help relieve swelling- the antioxidants found in a cucumber draw out the toxins, and will rejuvenate and moisturize your eyes.
You can also steep two green tea bags in hot water, then remove and refrigerate for a half hour. Remove the tea bags and place them on your eyes like you would the cucumber, and leave for 15-20 minutes. The antioxidants in green tea are more powerful than the cuke, and the chilled bags will help constrict the blood vessels under your eyes- which means restricted blood flow, therefore reducing puffiness and alleviating the blueish tint we all tend to detest. Or, you can use one of those gel-eye packs found in the allergy or beauty aisle of your local drugstore or supermarket. Even more simple... A chilled washcloth also works!
*Please note, if you're using the tea-bag method, always use green tea. Black tea will stain your skin!!!

This one may shock you, but it totally makes sense. Do you still have puffiness? Well, go raid your medicine cabinet... Or get ready to go to the pharmacy. You're going to need Preparation H hemorrhoid cream. Yes, read it again- you're seeing it correctly. That stuff that's supposed to be used on your bum works absolute miracles on eye puffiness. I swear, I wouldn't lead you astray. This stuff works! Now, I personally haven't needed to use it... But I have relatives and friends who have. Each swear by it. It stays in the makeup bag- so in case an errant husband or boyfriend doesn't grab it- because face it, we don't want something we use on our face used elsewhere. Even if it is meant for use in other places. I've watched the effects of how this proves to work most awesomely by one of my close relatives- and no, names will not be disclosed! It's none of my immediate family I will tell you! I watched as the cream was applied... and in a matter of minutes, the moderate bagginess turned into smooth, beautiful skin. I was astounded! Now since this was years ago, and they've changed the formula of Prep-H so that you'll need to be careful when you purchase this product. The key ingredient you're looking for? LYCD (Live Yeast Cell Derivative). Yep, that's right. Yeast Cells! However- a tip I was able to find online is that the formula that contains LYCD is available in Canada.... Which you can get by clicking ~*here!*~ The regular formula purchased here doesn't have great reviews for helping the face... So, if you've been helped by it or know someone that has... Please leave a comment below!!!

Once through these highly therapeutic treatments, it's time to put some makeup on that face! Simply looking like a raccoon just won't do- and a little touch of makeup is typically needed.

Product photo from e.l.f.

 First, make sure you always rinse your face with cool-cold water. Again- this will constrict blood vessels, and also tighten your pores. Always put moisturizer on first, and make sure to work into your skin very well. After this is done, I tend to grab a color-correcting quad and I start getting to work. This one I use is e.l.f's Complexion Perfection, and it has all four colors combined in to one sleek little compact.
Now, you can use each of these colors separately, but I find if you sweep a foundation brush or big fluffy brush (like a kabuki) across all four colors and swipe on your entire face, it will nicely reduce any bright colors in your complexion. Go back and do touch ups with the individual colors for more correcting coverage!
The green neutralizes redness (typically I use it on my cheeks, around my nose, and a swipe on my forehead)
The blue neutralizes orange (used on cheeks, forehead, chin and nose; tend to mix with green)
The pink neutralizes gray (great for under eyes!!)
The yellow neutralizes and brightens and neutralizes red

Product Photo from My Beauty Addiction
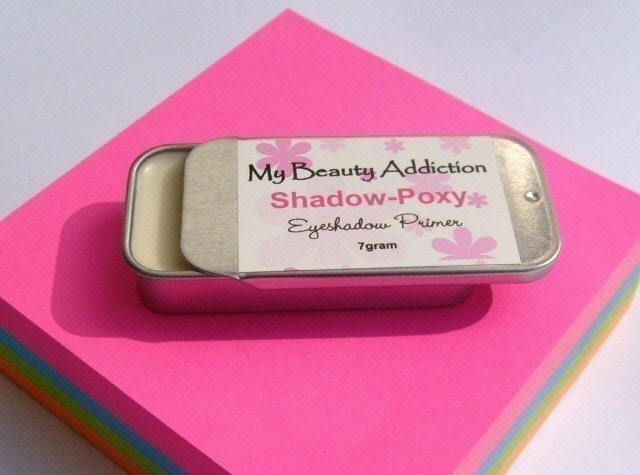
Next, I use a concealer/highlighter combination on my eyes on good days. On not so good ones, I use a stronger concealer. To get going on the easy days, after I've applied moisturizer- I then apply a swipe of my eyeshadow primer under my eyes. Hey- it works for keeping shadows put, it sure better keep my concealer in place! And it does!

So after letting the primer set for about a minute (roughly), then go ahead and pat on some of the highlighter on the inside corners of your eyes. This will help brighten your face and make your eyes appear wide awake! Now, the highlighter really can't be worn alone- so go ahead and with your finger, or a cosmetic sponge, pat some of the concealer all over the "bags" under your eyes.

Product Photo from e.l.f.
Allow about 30 seconds for it to dry, and then set with translucent powder. Sometimes, you can still see the dark circles- if that's the case, apply concealer again and set once more with powder. You can also layer on a spot or two of your foundation for extra coverage- always remember to set it with translucent powder!! This will ensure long-term coverage for the day. If you need more coverage, feel free to use a thicker concealer! Make sure you blend it in rather well- we don't want eyes looking "cakey" underneath... That's never attractive.

Once that's been finished, I go ahead and finish my foundation routine. Because I use a powdered foundation, I use it as my "translucent powder". Any little bit of coverage I can get for my bags- the better! You can do the same as well. After that's been done, I go ahead and play up my eyes!

You do want to remember that if your eyes are unusually watery, or red and irritated and leaking discharge- do not apply makeup!! You do not want to risk damage to your eyes by applying makeup and having it result in many potential, and sometimes serious injuries. Additionally, if it's some sort of bacterial infection you have and makeup is applied, you'll keep reinfecting your peepers because all of your tools have remnants of the bacteria lingering. Eek!
Remember: It's ok to not put anything on your eyes or face for a day or two! It allows your face to breathe, and you can indulge in some DIY home spa treatment!


xoxoxo ~*Snarky P

January 12, 2011

Oh My Giveaway - Hosted by H Squared

Hello lovelies...

I know this is totally last minute, but I wanted to let you know about a great giveaway currently happening over at the blog home of H Squared. She's hosting an awesome giveaway for a chance for two people to win 1 color selection from Mineral Maven.

A quick sidenote- I just found H2 (squared!) today... I've been a Twitter follower, but duh... I have my stupid moments and didn't realize she not only has a blog, but a facebook fan page too! Score!

Passion
Who is Mineral Maven you ask?
It's an indie cosmetics company, not unlike some others out there you may be familiar with from my own personal use, found on Etsy... Which is, of course, my favorite hangout online. It also happens to be my favorite place to purchase makeup since I've changed over to primarily using 100% natural, vegan cosmetics.
Lattuce

While I haven't personally tried the Maven's makeup yet, there's always time- and I look forward to it now that I've found her shop! There are pllllllenty of shades I'm currently drooling over!!

So click here to get to the blog post, and read the different ways you can enter to win a color!
Mint Freeze

And even though I've shared the fact that this is a giveaway being hosted... If you become a fan of Mineral Maven on Facebook and leave a comment- tell them BeautyByCharlie sent you!


xoxoxo ~*Snarky P