July 30, 2010

Product Reviews- Eyeliner and Mascara (and a brief lip thing)

So I'm asked quite regularly what type of eyeliner and mascara I use.

First, they're two of the sometimes three things I put on my face that isn't mineral makeup.
1) Eyeliner
2) Mascara
3) Lipstick/lipgloss


Eyeliner I'm very picky about. There's nothing worse than paying a few bucks (or more) for an eyeliner, in my case usually black, opening it for the first time... And realizing this is an awful product. I won't name names of companies, but I'll tell you what I myself currently use. I found Milani Slim Eyeliner by accident. I know I paid closer to $6 or $7 for it when purchased, but follow the link... And for $2.99 you can wear what I do.
 

I honestly thought my purchase was just going to be another bust- I never, ever find good eyeliner. Typically, I bought liquid because I was getting SO frustrated with pencil liners. I hated opening a "black" eyeliner, then having push the pencil hard against my lid- only to see my efforts left only a slight gray smudge. Really!?!?! Seriously?! So back we go, another layer. Darker gray. To get the black color- multiple layers were required. And that just takes too much time. But... there leaves the difficult task of trying to line your waterline (lower lid, almost against your eyeball) with liquid liner, and keeping your eyes from tearing up while you wait for the liner to dry. Daunting. Frustrating. Smudgy, and by the time you were done either I succeeded in smearing the liner everywhere, or I'd "cry" it off and there it was in streaks down my cheeks. Not ideal at all. It did not make me a happy camper.

So imagine how surprised I was when I opened this eyeliner up, and it literally just glided on. I barely had to touch my lid- and there it was! Smooth, black eyeliner on my eye! Pretty much effortless!! I was in heaven for about an hour after that. Checking my eyes in the mirror every time I went by- just to see the eyeliner in it's place. I think I went into shock for the rest of the day. I had a slight amount of smudge on the outside corner of my eyes by the end of the day- but hey! I found a black I could put on easily, and that more importantly stayed on!!!!!!!!!
My tricks for getting the eyeliner to "set" is quite easy. In my makeup collection, I have many, many mineral powdered eye shadows. If you apply a little bit of the powder to the line made on your eyes, it "sets" and won't smudge unless you do it intentionally. So whether the powders are applied wet or dry, it does indeed set the eyeliner so it's going nowhere! Perfection!


The latest mascara purchase I made... I really surprised myself. Honestly, I did! I remember this next company as having not so good makeup... Apparently, since the 10 years I last bought anything from them, they've really improved! I've only purchased mascara- but what I have now I'm impressed with. And it was only $2.99! Nothing like finding makeup that won't break the bank- but looks good too.


Yep. I bought Wet N' Wild Mega Wear mascara. It was cheap. I heart it. Now, I'll be honest- I don't need lengthening mascara- I never have. Nor thickening, or curling. My lashes are just in the way as it is. However- I did notice that they did lengthen with the use of said mascara. How do I know? My eyelashes have this totally annoying habit of hitting my sunglasses while they're on. And boy, they do.

The beauty of this stuff is that you can put a coat on, come back in a few min, put another. And another. And it doesn't really clump at all- I use a eyelash comb to get them out, but all in all... Awesome! I have not, however, bought any other makeup from them. I might get a lip tint or something.

And that's number three. I love lip gloss. I love lipstick. I love lip tints. So, sometimes, when I see something totally cute that I can't pass up... I get it. Though, my last purchase was a Burts Bees Lip Shimmer, and there's a few things I have to say about it.


This is my newest obsession. I have to have something on my lips, otherwise I look dead. And it needs to be moisturizing- there's nothing worse than a lip gloss that looks cute- but drys out your pucker and leaves you with a weeks worth of trying to get back to normal. You will not have this problem with Burt's! I  currently own Rhubarb, and I really really love the slight tint it leaves on my lips. And the tingly minty feeling it leaves on my lips, and scents... Oohhh how I need to have this with me at all times!

July 29, 2010

Too Cute to Pass Up - Paul & Joe Kitty Lipstick

I've been poking around a bit online today... And OMG- I had to share these...


Don't worry, I'll have eye pictures to post later on this afternoon... But I had to share this with everyone! I just about died when I saw this... Because, well it's really cute. And well, I'm totally a cat person. And... It's kitty cat faces on lipstick. Wild!!!!! I love it!


Dedicated to my friend, Feline, who I'm sure will get a wild kick out of this post!!!


Click here to be taken to the original link site.


So this creative lipwear is from Paul & Joe Beaute and I don't care at this moment that it's not mineral makeup... I'd buy these little lipsticks... Just because of the fact that they're cats!!!!!! I'd put them on a shelf and display them... Because, as well as having a cute lil kitty face- the containers the lipsticks are in are very pretty too...


Shades of pink are purrrrrfect- and see what I mean about the containers?!


Meow, meow meow meow...

July 28, 2010

Question and Answer Session- Fighting the Dreaded Zit

Q: Amanda I LOVE this page!! Can you discuss the best techniques for keeping your skin clear? I break out to an insane level after I travel (hence the band-aid on the forehead today). Any suggestions?


A: Well, I'll tell you personally what works for me!
I've pretty much given up all makeup that's purchased in stores. Why? I've made the switch to mineral makeup. Unless I can see exactly what chemicals are in eyeshadow, foundation, lipstick, lipgloss etc I don't wear it. The two exceptions are my eyeliner and mascara. Otherwise- my face is 100% mineral. 100% safe. Non-Toxic. Anti-Aging.
I'm super-picky about what goes on my skin. (can't you tell?!) When you read the ingredients list for any mineral product- you shouldn't see nano particles, bismuth oxychloride, synthetic dyes, petrochemicals or parabens. No sulfates, synthetic fragrances or phthalates. Funny sounding words indeed- but you need to watch what you put on your skin!

The general list you should see on a product's description or general ingredient list:
Mica
Oxides
Titanium Dioxide (some people are very sensitive to this mineral, it's always wise to do a test patch!)
Some may contain tin oxide
Carnauba Wax
Kaolin Clay (one of the best skin minerals- natural zit buster!)
Ultramarines (blue shades require this since there is no naturally occurring blue oxide)
Ferric Ferrocyanide (rarely)
Very, very rarely Cosmetic Glitter

These are acceptable.
However, we all know that skin does what it wants from time to time... And even though we baby it, take good care of it, and basically deserve to have wonderful looking skin... There it is. The dreaded zit. The nasty red splotch that decides to erupt from your face with a vengeance- right before the wedding, job interview, travel, etc....


You've gotta get rid of that nasty, ugly, red thing. Zit. I hate the "Z" word. My best tricks I'll share with you- since they're probably already in your loo right now.

Cleanse: You must do it...


A gentle cleanser or soap will do- my two favorites are Dove and Ivory soap. Both will leave you feeling squeaky clean, and ensure that you have no residue left on your skin- from makeup or soap.
(I like Dove a little more because it's got extra moisturizers...)


Plan of Counter-Attack: Witch Hazel


It's nature's antiseptic. Once you've cleansed your face, grab a cotton ball (come on, I know you've got those in the bathroom...) and soak some of the Witch Hazel into it. Dab onto those red devils, and let air dry. Typically, your red spots will dry up by the morning, and only require a dab of concealer. Remember- use mineral makeup- it will not clog your pores!

For Emergency Use Only: Clear Eyes


Yes, that's right. The eye drops. Still have redness during the day? A drop will take the red out... Of your eyes, and of your angry little zit. Don't believe me? Ask Ben Stein! Just kidding... This really does work wonders in a pinch! Just make sure that you don't touch the eyedropper to your skin- you don't want to contaminate the sterile solution in the bottle :)

Got beauty questions?!? Ask away!!!! Suggestions?!? Comment!!!!

Taylor Swift - Get the Look!

Updated 03/05/2011 & 03/06/2011


This is strictly my own personal opinion about the matter. All material uncovered was done through a public google internet search with a few different keyword entries.

Due to information uncovered and revealed about this company, I cannot in good conscience or good faith recommend anyone support this reportedly handmade, organic small business. If information had been disclosed prior to discovery by the shop owner herself, I would have no problem with continuing to purchase. Regretfully, the scope of the lie and how many different people it could have potentially affected and hurt leaves me no other choice than to say this is not an honest company to do business with.

For information as to why, you can read more below:


http://the-eyes-have-it-all.blogspot.com/2011/03/this-way-that-way-which-way-whats-going.html
http://the-eyes-have-it-all.blogspot.com/2011/03/long-tale-of-orglamix-organic-ending.html


Or click here for more links and topics. The information can be found just below the introduction paragraph on the page.

**********************************************************


Ok, so I promised you a blog tonight, and I know it's a little past midnight... So technically tomorrow. But I'll stop blabbering now, and get down to business!

I'm not a huge Taylor Swift fan, but I do find her pretty in some of her videos, and I do like some of her music. So, I've picked out a few I'm going to re-create. This is "Numbah One"!

She's so delicate, yet not-quite-innocent in her video "Our Song". I have a soft spot in my heart for country songs that has lyrics like "Our song is the slammin screen door..." ect. But enough jibber jabber.

First- we need ingredients.
Today, for this look, I used my Orglamix Collection.... Oh what fun it was!

Three colors are all I used for this look. It honestly didn't need much at all.
Sesame, Brimstone, and Vanilla Birthday Cake were the three choices- as the Sesame is a gorgeous shimmery silver, Brimstone for dimension, and VBC to highlight and add sparkle.


First, you want to use primer on your eyes. The cute lil' Skully primer I did get from my other favorite makeup supplier, Moi Minerals Cosmetics . Why put on primer? I'll tell you, and it will be your best friend!!! Applying primer before you swipe on some color of eye shadow ensures that you'll get long lasting, vibrant, crease-free color for the duration of your wear. Don't believe me?? I'll do another post sometime this week that will show you that I can put makeup on in the morning, and have it look just as good in the evening! Even after a swim!


Ok so now that we have the primer set and applied to your entire eye, and a swipe on your lower lid- open your silvery color. Using the "Touch Up" brush, I applied the color to my upper lid, extending it a little outside the crease of both my eyes. You want to make sure you "pat" the color on- silvers can be difficult and quickly end up being a dull gray from too much blending.


I used the "Touch Up" brush as my eyeshadow applicator- I just love the contour of the brush, and it always puts on just enough color. You can layer the silver shadow for a darker look, but I wanted to keep this easy and quick.


Next up is Brimstone. It's a silvery black, a nice complement and a great color to add dimension to the silver shadow. Using the precision brush, I applied the color to the outside corner of my eyes, and swept the color into my crease. Blending the color is fabulous using the precision brush. Swipe on a little on your bottom lid.


Out comes the Vanilla Birthday Cake. It's a delightfully sparkly white color that's perfect for toning down colors so they're not so vibrant... And also wonderful as a highlighter. Using the "Touch Up" brush again, swipe the color along your browbone.


Next, pat a little over the colors already applied to your lids. This will bring the color down and make it not as harsh. You also want to remember to pick up the white and dust it over the silver on your bottom lid, and then again below the silvery color. We want to be very sparkly here! Don't worry- we can add more if we need it...


Using the concealer brush, cover up any spots or places that need a little extra coverage. For me, especially lately, I have awful bags under my eyes. Taking the foundation and patting a little over the blue black circles does wonders for covering it up.... See?!


In the photos above, you can see how I've applied the foundation to my right eye. In the second photo, you can see the difference in skin tone between my left and right eye. Go away ugly eye bags!!!


Next, we want to apply foundation to the face. Remember from the Essentials Post yesterday that it's important to have a Kabuki brush for application of foundation. It blends it juuuuust right. So pick up a little foundation at a time, and in small circular motions blend the it into your face. Don't worry- the color will self-adjust to your skin tone and look wonderful!


Next we want to fill in brows. For me,  I have to do this. I'm a natural blonde (shhh! don't tell anyone!!) and my brows tend to come in lighter than I'd like them to. So in order to get them to cooperate, I need a little assistance from brow powder.


With the correct brush, the angles come out perfectly! You want to make sure you don't pick up too much powder- you don't want to over-do it! You could end up looking like "bushy-brow"... But if that's the look you're going for... Have fun!!


Next... Eyeliner. I love eyeliner. I think I over did this a little, and ended up with a different video look than Taylor had... But it's ok. It's all about interpretation, right?! So I lined one eye, and left the other with just the shadow to show you how much to put on.


You don't want a super-thin line, but you don't want a really thick one either. Sharpen your pencil before you apply the liner- this will give you more "play" with the application. Once your eyes are lined, take a bow! You've done great so far!

It's here that I picked up a little more of the VBC shadow, because I didn't think I was "sparkly" enough... So I patted some more on the gray area above the crease of both eyes, and then to the inner corner and blended outwards. Also remember to apply some more to underneath your eye- your black eyeliner just covered some of it up and we want to sparkle and soften the look!


So far, we've got the eyes almost done... And face has been taken care of. Now it's time for blush... I have just a plain brush I use to sweep some color on. You typically want to stick with peaches and neutral tones- unless you really want shimmery or red cheeks. No, I haven't done a doll look yet... Meh. Well- take a brush- and lightly sweep the color from the top of your cheekbone downwards to your cheek. This will deposit the color in a most flattering way, and looks natural too!


Now, pick up your angled eyeliner brush and the Brimstone eye shadow. Using the brush dry, dip it into the color and lightly apply the color to the black eyeliner you've already put on. That's right- shimmery black right on over the harsh black eyeliner! You can smush, smudge and soften the lines on your upper and lower lid if you like... I did a little bit. Again- don't be afraid to use the brush or the color.


And one of my favorite things to do... Apply mascara! Actually, it's only fun if I manage to not stab myself in the eye with the wand... But, today was a good day. It didn't stab me! Since I have super-long lashes (I know, I know, you hate me...) I only had to do 3x coats of mascara to get the same look Taylor had with fakies. You didn't actually believe those lashes were her own, did you!


The look is complete! How's that for a picture-does-it tutorial?! Bat those lashes, give sexy sultry looks- darlin, you're worth it! And all this work on your eyes is nothing short of fabulous!!!


July 26, 2010

Question and Answer Session- Essentials You Need

Q: Amanda, can you post instructions on application like the photos on your album? Also what are the best eye makeup tools and what brands of shadow do you recommend? Any trips for getting more long lasting effects of out my shadow?

A: Absolutely!!
Eye makeup tools: Right now- if you're still using the sponge applicators- throw them in the trash! Immediately! They do no good in getting an awesome look- at ALL! What do you use?? A brush set.


Honestly, I got my "kit" from CVS. Yes- you read that right. The drugstore. Not Sephora. (But that's a kickass store to be discussed another time...) This goes to prove that even the expensive brushes that are "better" aren't necessarily such. I get these amazing looks from a $12.99 kit that has it's own zip-up bag. Each brush is just the right size- they aren't too long so that if you're leaning into the mirror trying to get on eyeshadow, you keep tapping the glass with the brush or end up poking yourself in the eye with the brush end. Nope. However- don't get brushes so short that they slip and slide out of your hands.


And now to introduce the brushes I use:
Fine - Precision brush.
The fine tip applies makeup in spots you just need a touch- like a white/silver/highlighter in the corner of your eyes to brighten them. Or, if you just want a hint of color somewhere- this is the go-to brush!
The precision brush is used for eyeshadow, and it applies the color very specifically. I like to use this to get a straight line of accent color to the outside edge of my eyes. It can also be used to apply color to your lower lid as well.
Smoky - Angle brush.
These are the most versatile brushes of my kit!
The smoky tip is great to blend colors together that you want a bit mixed, or to smudge out eyeliner for a smoldering and sexy eye. If you happen to put too much color on, this can also be used to "blend out" the harshness and have a more softened look.
The angle brush is great for applying a lot of color at once. For instance, if you want an all over neutral tone- this is what you would use to get the color applied. Quick and easy does it!


Touch-Up - Conceal
Ok,so I don't use the touch-up end for what it's supposed to be for... Instead, this is my main applicator for colors. It picks up just the right amount of powder, and deposits it right where I want it- talk about maximum control! This brush also does wonders to blend colors together, overlay multiple color layers, and just in general rocks my socks. So while it's not being used in the traditional sense it's supposed to- I love how it works for me!
Oh how I love my conceal brush... This picks up my slightly lighter foundation and applies it as spot concealer. Yep- that's right- my foundation is powder, and this brush applies it like liquid concealer. How awesome is that?! A few pats over the red zit offender- and it's... Gone! Well, nearly! This does a great job of covering it up.

Smudge - Brow
This brush- I've never used. I assume it's to blend colors together- but it's a piece of rubber sponge. Thanks- but I'll stick to the bristles for now. If I ever do end up using this- I'll let you know how the procedure went.
The brow brush is an essential must have. I do color in my brows- because even though I'm currently a red-head, and my natural color is blonde... My brows need a little help because they tend to pale out. So, a few swipes of color fills them in perfectly- and the angled brush works wonders for controlling shape, and where the color goes.


Eyeliner brush.
The only "splurge" I did make, however, was a $6 eyeliner brush. I know- breaking the bank! I was torn when I first started using only mineral makeup- I didn't know if I should get the straight or angled brush. A friend I knew that has used powdered makeup said I'd be happier with the angled brush- and boy was she right!
 You want a decent brush- so don't get the cheap versions of these. This is why I spent six bucks on it. Oh, I'm sure I could find it for a lot more in a makeup store, etc- but this one's been great for me. I can apply just enough eyeliner to define my eyes a bit, or go totally thick and bold. What you're looking for is even bristles that aren't too thick. Remember- you wet this brush to apply your eyeliner- so depending on the look you're going for, having a skinnier brush is best. It's sort of like an article of clothing- buy it bigger because it can always be taken in. Something too small is hard, if not impossible, to let out.

*WHEW*
Done with brushes!


Brands of makeup. This, for me, is very easy. Last year, I made the transition to almost 100% mineral makeup. My exceptions are my black eyeliner and mascara. Other than that, my face is totally natural. Yes- those wild and crazy colors are all 100% natural, toxin-free, and safe for skin. This means- you're not aging quicker, and your skin will thank you SO much for it! I've had hardly any breakouts since making the switch- and I don't care what can be found at the mall... I'm not paying exorbitant prices for makeup.

My foundation is Physicians Formula Organic Wear. I love this makeup- and couldn't be happier with the coverage it provides without being "cakey". It's applied with a big, fluffy Kabuki brush. There's one included with the purchase of the foundation, but my really sensitive skin doesn't really like the "rough" feeling of it. So I bought another one- pictures later!


For eye shadow, and blush/bronzers, I now use two different kinds. Both are only organic, and both have wonderfully vibrant and beautiful natural colors to choose from. Since I'm an Etsy hunter- this is where I found both suppliers I'll recommend below. If you want super-staying power for your eye makeup because half-way through the day you find that your face is melting... You'll definitely want eye primer. I started out using Urban Decay Primer Potion and now use a natural, mineral primer- see that cute Skully container in my makeup box?? That's my primer! Reason being- I want to be as good to my skin as possible.


The first I discovered was Orglamix Cosmetics, and let me tell you- her makeup is nothing short of amazing!  She always runs a special Color of the Week for $2.50- who can beat that!? She's got ALL sorts of colors available- mix and match, or buy in a "Get the Look" combination. Or just buy some colors and experiment like I do: an example is below, using only two colors applied wet- Citron and Absinthe. The black eyeliner, and covering it with Brimstone, then adding mascara is a given.


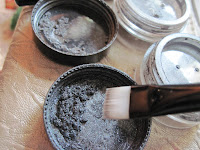
I store my eye colors upside-down. The reason is that I can a) see the names of the colors I'm looking for and b) have the pigments shaken out into the lid.

Get the look above:
1. Open your eye colors- make sure that some of it is in the cap of the container.

2. Wet your applicator brush- not sopping wet, but enough to "mix" and wet your color of choice.
3. Once enough color is picked up on the brush, sweep color on to your lid first.
4. Wash brush to rid it of excess color, and squeeze water out in a towel.
5.  Dampen brush again, and pick up second color and apply it where you want it.
6. Repeat until satisfied with colors. (once dried, you can blend the edges a little bit)
7. Add eyeliner, mascara...
*POOF* You're done! Easy as that! I just realized I forgot to mention Scotch Tape. Yes, it was used to get this look. Anytime you want a clear, defined end to your makeup at the outer edge of your eye- use Scotch Tape. Peel off a piece that's long enough to go from just under the corner of your eye, to the edge of your brow. Once your makeup is applied and you're happy with the results, peel off to show off that sharp defined eye work you just finished creating!


The other company I buy from is Moi Minerals which I just very recently discovered. She also uses 100% minerals- and currently has some awesome deals for makeup! This is the shop I got my Skully Primer from- while there aren't any more of those, she does still have primer in pots for $4. Can't beat that! All day wear- no creasing- vibrant color for $4. This will last you a very long time! You'll also be able to find color shifters- for instance, the color "Mercy" I used below is a blue/purple in the jar- and vibrant when you actually have it on! It's a beautiful purple color- and turning your head in the light will show off the blue shifter tones.


This particular look was a little more involved than the one I showed you above- a total of 6 colors on my eyes. Here we go:


Get the Look:

1. Primer applied all over eye- lid to browbone
2. Fame is applied to inner corner of my eyes, top and bottom
3. Spank Me is applied to the middle of my eyes and on bottom lid
4. Mercy is applied to the outer corner of my eyes and bottom lid
5. Blend the colors together at the edges, adding more color if line becomes too blended
6. Panic applied above the blue colors and blended in to the top edges 
7. Black eyeliner is swiped on, and covered in Emerald Green
8. Two coats of mascara, and the look is complete!


So... I hope this helps get you started on how to use the right brushes, experiment with crazy colors, and two *fabulous* companies to buy them from for less than you can with other "high end" mineral makeup companies! Don't be afraid to play with color- just go for it!